A hem is made when you fold the bottom raw edge to the wrong side or back of the garment, for 1 1/2 -2 inches, then stitch in place by hand or sewing machine. The fold line becomes the hemline.
There are many different ways to hand stitch a hem.The easiest and most common hem stitches are the slip stitch and blind stitch. Both can be worked over a folded top edge, a serged raw edge, an edge finished with hem tape, ribbon or lace. Hand stitched hems give an almost invisible finish.
A machine stitched hem is fast and easy but while leave a visible line of stitching on the right side of the garment. A blind stitched hem will give you an almost invisible hem finish and can be stitched using any sewing machine with a zig-zag or embroidery stitches.
All these stitches are worked using a single length of thread. The old rule of thumb for the length of thread is from your fingers to your elbow. If you run your thread over wax it will help to stop the thread from forming small knots.
Slip stitched hem
This hand stitch has many uses. A slip stitch is also used to close a lining, create an invisible seam between to folded fabric edges,(closing a stuffed toy or cushion) a folded or flat hem edge and to attach an applique.
Begin by threading your needle and making a small knot on one end of the thread, To make the knot, rap the thread around your index figure and roll the thread off your figure. Pull the thread to tighten the thread and form the knot.
Fold your hem up on the wrong of the fabric or garment and pin in place. Fold the raw edge of the hem under 1/4 inch and press to hold in place. With the wrong side of the fabric/garment facing, place the point of your needle behind the top folded edge of the hem; bring your needle to the right side of the hem so that the knot is hidden behind the hem.


Bring the needle up though the folded top edge of the hem, approximately 1/4 inch over from the last stitch, pull the needle and thread until the stitch tightens.

Repeat along the hem . Secure your stitches with a small knot.

To make the knot, take a small stitch into the hem only and pull the thread though until you have a small loop. Pass the needle though the loop to form a second loop,

To make the knot, take a small stitch into the hem only and pull the thread though until you have a small loop. Pass the needle though the loop to form a second loop,
 Pass the needle though the second loop and pull the thread until a knot forms. Take a small stitch into the hem only, pull the thread though and cut the thread close to the fabric.
 You will have a tiny row of stitches just visible on the right side of the fabric/garment. Remove pins and press the finished hem.
 Blind hem stitch.
A blind hem stitch is almost visible on either side of your fabric/garment.
Fold your hem up on the wrong of the fabric or garment and pin in place. Fold the raw edge of the hem under 1/4 inch and press to hold in place. With the wrong side of the f
abric/garment facing, place the point of your needle behind the top folded edge of the hem; bring your needle to the right side of the hem on the fold line, so that the knot is hidden behind the hem.
Fold your hem up on the wrong of the fabric or garment and pin in place. Fold the raw edge of the hem under 1/4 inch and press to hold in place. With the wrong side of the f
 Take a small stitch into the fabric/garment, approximately 1/4 - 1/2 inch over take the needle back into the fold at the top of the hem.
  Run the needle in the fold of the fabric for about 1/4-1/2 inch before bring the needle back out of the hem.
Take another tiny stitch into the fabric just below where the needle came out of the folded top of the hem then back into the fold. Repeat along the hem. Secure the last stitch with a small knot. Remove pins and press the hem.
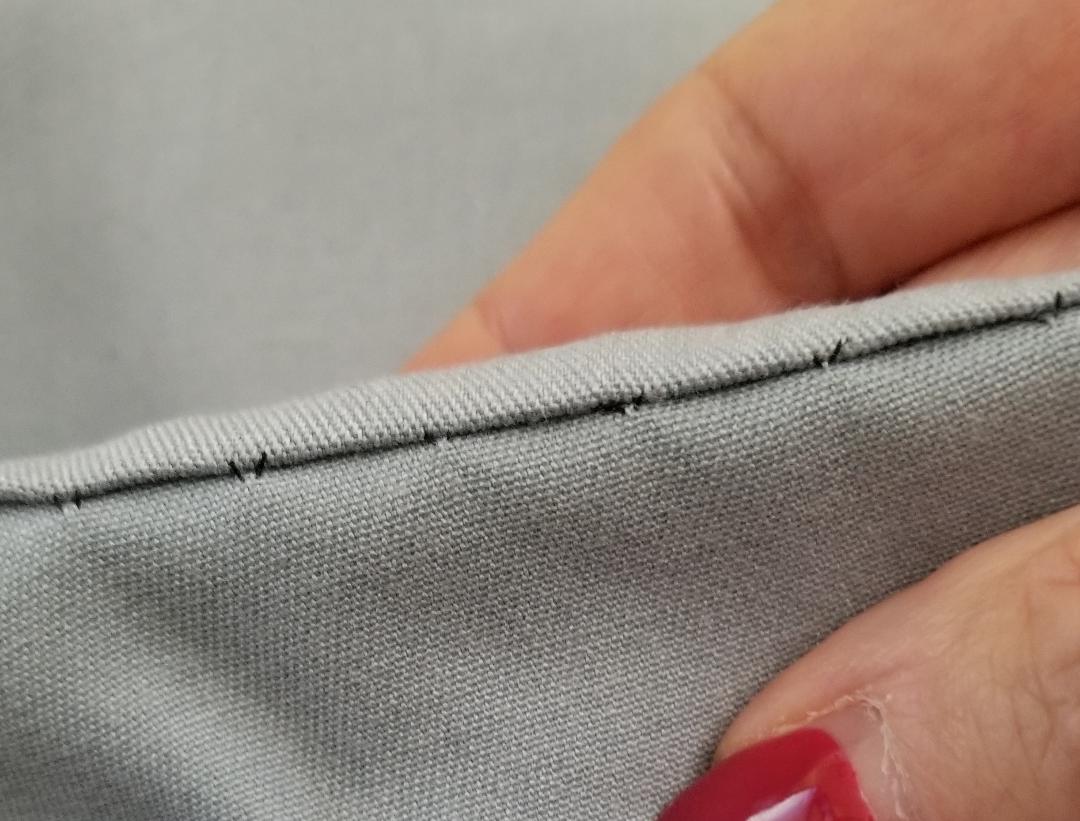 There will be a row of tiny 'V's' where the thread is coming out of the folded top edge of the hem picks up a thread on the fabric of the garment before going back into the fold.
Catch stitch
A catch stitch has a criss crossing of the thread that adds strength. Catch stitch can be worked over a folded top of a hem or for heavy weight fabrics over the raw edge of the hem. Catch stitch also has a little bit of movement.
Bring the needle up to the right side of the hem approximately 1/4 inch down from the raw edge of the top of the hem, to hid the knot.
 Take a small back stitch into the fabric/garment approximately 1/2 inch over from your first stitch.
  Now take a back stitch in the hem approximately 1/2 inch over from the last stitch and 1/4 inch down from the top raw edge of the hem. Repeat along the hem to last stitch, secure with a small knot.
Figure 8 Stitch
This stitch is used when you are making a hem in a crepe fabric or a fabric with added stretch. Fold your hem up on the wrong of the fabric or garment and pin in place. Fold the raw edge of the hem under 1/4 inch and press to hold in place. With the wrong side of the fabric/garment facing, place the point of your needle behind the top folded edge of the hem; bring your needle to the right side of the hem so that the knot is hidden behind the hem.
 Take a small back stitch in the fabric/garment straight across from the first beginning stitch.
 Make a small back stitch back into the stitch in the hem. This forms a figure eight.
Take the needle into the fold at the top of the hem and bring the needle back out on the front of the hem approximately 1 inch away from the first figure 8 stitch. Repeat along the hem. Secure the last stitch with a small knot.
 |
| finished figure 8 hem |
Machine stitched hem
 Fold your hem up on the wrong of the fabric or garment and pin in place. Fold the raw edge of the hem under 1/4 inch and press to hold in place. With the wrong side of the fabric/garment facing and a stitch length of 2.5 - 3mm machine stitch close to the fold at the top edge of the hem.
Machine blind stitched hem


Turn the hem up the decided width and pin in place. Fold the top raw edge of the hen under approximately 1/4 inch and press.
Lay the hem flat on the machine table and fold the fabric/garment back onto itself so that you can see the wrong
side of the hem .
Using the blind stitch setting on your sewing machine with the zig zag set at 2 -2.5 width, and stitch length 3mm, stitch along the top of the hem close to the fold so that the point of the zig zag stitch goes into the fold. Press the hem on both sides to flatten.
side of the hem .
 |
| Finished hem before pressing |
Using the blind stitch setting on your sewing machine with the zig zag set at 2 -2.5 width, and stitch length 3mm, stitch along the top of the hem close to the fold so that the point of the zig zag stitch goes into the fold. Press the hem on both sides to flatten.
  |
| |
This is exceptional tutorial article for all the embroidery people and we can easily develop our skill in the concern department in the easiest way thanks for sharing. There are multiple embroidery digitizing companies but we can provide professional digitizing service with perfect result.
ReplyDelete