Pocket Flaps


A pocket flap can sit over a double piped, single piped pocket, a patch pocket and even an in-seam pocket.
They can be small or over sized and have square or rounded corners or a mixture of both. The pocket flap can be used to change the silhouette of a garment as Christian Dior did in 1947 and you can see this also on the Alexander McQueen jacket.

In this Chanel coat the over sized patch pocket and pocket flap are set at an angle to flatter the body. The pocket flap is also cut at an angle being longer at the back than front with rounded corners.

Again the pocket flaps are set over patch
pockets but this time they have been used
to balance the coat and are set straight and
cut with square corners and a dip in the center military inspired.


It is also not nice if the stripe or check is not matching with the stripe or check on the garment.Things like this cheapen a garment.


Or think of piping the edge of the flap or adding an edging of contrast contrast color as Viktor and Rolf did. This is after the fashion of the school uniform.
Adding design elements such as these give the garment a modern twist even if these techniques have been around for ever, it is just how the designers have chosen to use them.
What you don't want your pocket flaps to do is sit out away from the body because they are not constructed correctly. Or to be smaller in length than the pocket underneath. This is so ugly!
To make the flap that becomes part of a double or single piped pocket
Step 1
Draw a rectangle onto paper that is 1/8 inch (.3 cm) longer in width than your finished pocket measurement. This 1/8 inch (.3 cm) creates ease at the top of the flap will enable the flap to follow the contours of the body. The length of the rectangle is a design choice but the traditional flap on a man's jacket set into a double piped pocket is about 2 1/2 inches (6.5 cm); extend the side of the back flap by 1/4 inch (.6 cm) and draw in the new line. By extending side back of the flap it help the flap to follow the contours of the body.
And finally add a 1 - 2 inch (2.5-5 cm) extension across the top of the flap.

Now you have a basic pocket flap make any changes to the shape by rounding the corners, etc. to your pattern. Add seam allowances and cut the flap out of your fashion fabric.
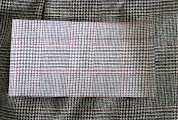 |
| The check is matching at the lower edge |
Step 2
 Place the flap onto the right side of the lining; pin or baste across the center of the flap and cut the lining even with the flap; ease the fabric flap in around the edge of the lining making the lining slightly smaller than the flap
 pin in place and machine stitch lining side up, with a stitch length of 2 mm the 3 sides of the flap securing both ends of the stitching.Trim the excess lining back and turn the flap to the right side, press.
Step 3

Prick stitch the 3 edges of the flap (optional )

baste across the top extension to hold the lining in place; draw a chalk line across the top of the flap marking the beginning of the flap extension.
Step 4
 The double piped pocket will have been sown together up to the pocket bag being attached behind the piped pocket; insert the flap into the top of the pocket using the chalk line as a guide

baste across the top piping adjusting the ease evenly across the center of the flap.

Step 5
Finish the pocket by attaching the pocket bag. The pocket back is not needed as the flap covers the pocket opening.
 |
| I left the pocket bag off so you could see now the flap sits behind the piping |
A flap that sits over a patch pocket
Follow step 1 but don't add the 1-2 inch (2.5-5 cm) extension to the top of the flap, add the seam allowance plus 1/4 inch (.6 cm). Construct the flap up to Step 3; turn the seam allowances into the flap along the top edge and baste in place before slip stitching to close, press; prick stitch the 3 edges of the flap (optional ); draw a chalk line 1/4 inch (.6 cm) down from the top across the back side of the flap; place the chalk line on the flap onto the flap placement mark on the garment so that the 1/4 inch (.6 cm) extension is facing down towards the pocket; baste the flap extension to the garment adjusting the ease evenly across the center of the flap and using matching thread; stitch the flap to the garment; fold the flap down onto the pocket and press over a ham.