Tailoring 101 Week 6
Finishing the front and starting the back

Continuing on with the fronts. Now that you have the chest piece pad stitched to the canvas it is time to attach the canvas onto the jacket fronts. Lay the canvas on a table with the chest piece upright.
With either chalk or pencil transfer all the pattern markings e.g. darts, centre front line, roll line, waist line and pockets.
Lay the canvas flat on the table chest piece side down; lay the jacket front onto the canvas with the right side facing you; match all the notches, darts and pockets;
Cut the canvas around the pockets so that it is sitting flat under the pocket bag.

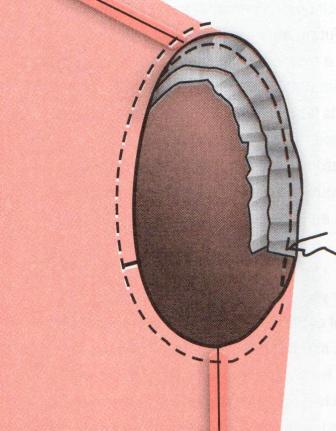
Using contrasting thread baste stitch along the centre front line starting at the hem and finishing at the break line; starting at the hem baste stitch a second row approximately half way across the canvas curving slightly up to 2-3 inches ( 5 - 7.5 cm) down from the shoulder; continue stitching across the shoulder to 1-1 1/2 inches ( 2.5- 3.2 cm) in from the armhole edge, stitch around the armhole edge; starting at the hem line baste stitch a third row of stitching on the edge of the canvas up though the pocket curving over to the back edge of the side panel or up to the under arm to meet with the baste stitches around the armhole; baste stitch along the waist line towards the dart for approximately 3 inches (7.5 cm); baste stitch along the roll line from the centre front up to the gorge at the top.

Not sure of the roll line - turn the front over before baste stitching the roll line so that the canvas is facing you; place a ruler along the line you have marked as the roll line, fold the fabric over the ruler and mark in the roll line at the edge of the ruler.
The baste stitching should not be pulled to tight and when finished all the notch points will be matching.
 Taping and shaping the roll line
Using a 1/4 inch (5 mm) linen or cotton tape or a strip of pocketing fabric begin by pining the tape to the canvas at the top of the roll line;pull the tape taut or apply tension to the tape until half way down the roll line, pin tape in place. You will get a rippling effect on either side of the tape. Continue to pin the tape down to the break line with no added tension. Slip stitch down both sides of the tape stitching into the canvas.
The lapel
The lapel is now going to be pad stitched but before starting the stitching mark the seam allowance around the lapel and down the front edge onto the canvas with either chalk or pencil.

Because you don't want these pad stitches to show though to the under side of the lapel use a thread that matches the fabric.Roll the lapel over your hand with the canvas side facing you pad stitch from the top line marking the seam allowance down to the break line following the taped roll line. The pad stitches are going to be 3/8 inch (1 cm) long and 1/4 inch (5 mm) apart, much closer and smaller than the pad stitches on the chest piece. Keep a finger under the lapel to feel the needle as it comes though the fabric, as you feel the needle take the needle back so that it just catches the fabric before bringing the needle up on the canvas side. Don't pull the stitches as you stitch as this will cause the lapel to pucker and don't stitch into the seam allowance. The lapel should look slightly dimpled on the fabric side when you have finished.
 |
| Fg. 6.18, page 81, Tailored Fashion Design |
The peak or top edge of the lapel is pad stitched with smaller, rolling the peak towards the shoulder as you stitch. Closer stitches to give a firmer point that wont roll forward or droop.
Menswear - turn the work so that the fabric is facing; prick stitch along the roll line starting from the break line to 1/4 inch (5 mm) from the gorge line use a thread matching the fabric.


Cut the canvas along the line marking the darts; push half the canvas under the dart with the other half laying flat over the dart; catch stitch the edges of the canvas over the dart.

Catch stitch the top edge of the pocket bag to the canvas and half way down the pocket bag to hold the pocket in place.
Taping the front edge

Check the width of the seam allowance around the lapel on the canvas and re mark if the stitching have pulled in and distorted your original line marking the seam allowance. Using 3/8 inch (1 cm) linen or cotton plain weave tape, pin the tape to the canvas at the top of the roll line inside the line marking the seam allowance; pin across to the lapel tip and twist the tape under and continue down to 1 inch (2.5 cm) above the break line; pull the tape taut or add tension to the tape for the next 2 inches (5 cm) and continue pining the tape down to the hem line. If the front hem line is curved or rounded add tension or hold the tape taut around the curve line. Slip stitch both sides of the tape to the canvas.
Repeat on the other front matching the length of the roll line tape and the taped front edge. Do not press the lapel or cut away any canvas in the seam allowance until after the next fitting.
The Back
 |
| Elsa Schiaparelli evening coat (back), c. late 1930s, Paris |
The back of a jacket/coat can be completely different from the front adding more interest to your design. The back can be single or double vented, split, laced or zippered. The back can be belted with a full or pleated skirt or have tails. Let your imagination run free and see what you can add to your design.
 |
full back skirt
|
 |
| http://www.cichic.com/full skirted coat |
 |
http://www.vogue.co.uk/fashion/autumn-winter-2009/ready-to-wear
Yohji Yamamoto
|




 Turn the front to the wrong side; cut the canvas (only) away from the buttonhole position line, A.


 folded strip that matches lines B-C; stitch across from one pin to the other starting and finishing with a back tack exactly in the centre between the fold and A. This makes the piping for the buttonhole.


 Pull the piping strips to the wrong side and pull the ends to square up the corners of the buttonhole and that the folded edges meet in the centre of the buttonhole. Be careful not to pull on the triangles. Place the front right side up on the table and fold back the jacket so that you can see the triangle sitting on top of the ends of the piping strip; stitch the triangle to the piping strip making sure that the first row of stitches is close to the folded back line.
 The back of the buttonhole will be finished after the front facing has been attached.

 Trim the canvas back out of the seam allowance; fuse interfacing to the wrong side of the centre front seam allowance; right sides together, place the separating zipper so that one side of its teeth are sitting along the center front line and that the top of the zipper is approximately 1/4 inch (5 mm) down from the neckline stitching line; the lower end of the zipper is going to be approximately 3/8 inch (1 cm) up from the hem line; machine stitch along the outer edge of the zipper tape
  Make a guard that is going to be slightly shorter than the front opening with the finished wide approximately 3/4 inch (1.9 cm) plus 1-1 1/2 inches (2.5-3.5 cm).
 Finish by top stitching the zipper in place.

 But the peplum can be a lot simpler with less fullness. I can only imagine this as the back of an evening jacket.
 Make a clip into the top of the hem where the jacket hem and vent facing meet
 fold the fabric back at a 45% angle, right sides are and the 2 clip marks are together and machine stitch from the point to the seam allowance at the raw edge of the hem; back tack both the start and finish of this seam
 On the under side of the vent turn the hem back on itself right side of fabric together and sew along the seam line from the fold.

 Using contrasting thread baste stitch along the centre front line starting at the hem and finishing at the break line; starting at the hem baste stitch a second row approximately half way across the canvas curving slightly up to 2-3 inches ( 5 - 7.5 cm) down from the shoulder; continue stitching across the shoulder to 1-1 1/2 inches ( 2.5- 3.2 cm) in from the armhole edge, stitch around the armhole edge; starting at the hem line baste stitch a third row of stitching on the edge of the canvas up though the pocket curving over to the back edge of the side panel or up to the under arm to meet with the baste stitches around the armhole; baste stitch along the waist line towards the dart for approximately 3 inches (7.5 cm); baste stitch along the roll line from the centre front up to the gorge at the top.
 Taping and shaping the roll line
  Because you don't want these pad stitches to show though to the under side of the lapel use a thread that matches the fabric.Roll the lapel over your hand with the canvas side facing you pad stitch from the top line marking the seam allowance down to the break line following the taped roll line. The pad stitches are going to be 3/8 inch (1 cm) long and 1/4 inch (5 mm) apart, much closer and smaller than the pad stitches on the chest piece. Keep a finger under the lapel to feel the needle as it comes though the fabric, as you feel the needle take the needle back so that it just catches the fabric before bringing the needle up on the canvas side. Don't pull the stitches as you stitch as this will cause the lapel to pucker and don't stitch into the seam allowance. The lapel should look slightly dimpled on the fabric side when you have finished.

 Cut the canvas along the line marking the darts; push half the canvas under the dart with the other half laying flat over the dart; catch stitch the edges of the canvas over the dart.
 Catch stitch the top edge of the pocket bag to the canvas and half way down the pocket bag to hold the pocket in place.
 Check the width of the seam allowance around the lapel on the canvas and re mark if the stitching have pulled in and distorted your original line marking the seam allowance. Using 3/8 inch (1 cm) linen or cotton plain weave tape, pin the tape to the canvas at the top of the roll line inside the line marking the seam allowance; pin across to the lapel tip and twist the tape under and continue down to 1 inch (2.5 cm) above the break line; pull the tape taut or add tension to the tape for the next 2 inches (5 cm) and continue pining the tape down to the hem line. If the front hem line is curved or rounded add tension or hold the tape taut around the curve line. Slip stitch both sides of the tape to the canvas.