Tailoring 101 Front closures
This week is about finishing the jacket front. While you can make the bound buttonholes, attach the front zipper and other forms of closures to the jacket before the back, I find it is better to fit the jacket body and make any alterations first. Once the bound buttonholes are made you can't go back and change their placement or re- position and who wants to un-pick a zipper.
The bound buttonhole
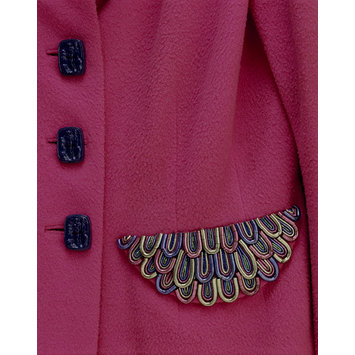 |
| http://collections.vam.ac.uk/item/O15678/evening-jacket-elsa-schiaparelli/ |
The bound button hole is usually found in women's wear and the key hole buttonhole in menswear.
Step 1: is finding and marking the correct placement for the buttonholes. This is an important step to follow as you want all your button holes to be the same length,size and an equal distance apart. Unless it is a design choice you also want them to sit squared to the centre front line.
You will have the centre front line and waistline baste stitched on the jacket front, so now find the correct position for the other buttonholes and mark with a line of baste stitching, A.
Buttons pull forward when the jacket is been worn so that almost half the button is sitting outside the button hole towards the front edge, D. To compensate for this the buttonholes are not centered on the centre front line but they do need to start far enough back from the centre front line so that the button does not extend over the finished front edge.
 |
| markings on right side of jacket front |
- Measure half the width of the button plus 3/8 inch (1 cm)
- Mark onto the jacket front as the front end of the buttonhole and run a length of basting stitches that starts above the top button hole position extending down past the bottom buttonhole position, B
- now mark in the length of the buttonholes and baste stitch down from the top buttonhole position to the bottom, C. You will now have each buttonhole marked with basting stitches (A) and 2 vertical lines (B&C) marking the ends of the buttonholes.

Step 2
Cut a strip of fabric on the straight of grain or cross grain approximately 1 inch (2.5 cm) longer than your buttonholes and the length of your marked buttonholes plus 2 1/2 inches (6 cm). Or if you are matching a pattern allow 2 1/2 inches (6 cm) of length for each buttonhole.
Mark with a chalk line the centre line of each buttonhole on the wrong side of the fabric
Step 3
 Turn the front to the wrong side; cut the canvas (only) away from the buttonhole position line, A.
Step 4


Place the right side of the strip to the right side of the jacket front matching the chalk lines to A; machine baste across the chalk lines; draw a chalk line across the strip 1/2 inch (1.2 cm) above and below line A; if you are using a continuous strip measure up and down from A 2 1/2 inches and cut tough the strip.

Step 5

Fold the strip along the chalk line so that the raw edge extends down over A; place a pin through the
 folded strip that matches lines B-C; stitch across from one pin to the other starting and finishing with a back tack exactly in the centre between the fold and A. This makes the piping for the buttonhole.
 |
| Cord can be inserted into the piping. |
strip back on it's self so that it is not caught in the stitching.
Step 6
 |
| wrong side of jacket front |
Step 7
 Pull the piping strips to the wrong side and pull the ends to square up the corners of the buttonhole and that the folded edges meet in the centre of the buttonhole. Be careful not to pull on the triangles. Place the front right side up on the table and fold back the jacket so that you can see the triangle sitting on top of the ends of the piping strip; stitch the triangle to the piping strip making sure that the first row of stitches is close to the folded back line.
 The back of the buttonhole will be finished after the front facing has been attached.
 |
| Giorgio Armani Spring 2014 Ready-to-Wear Collection Slideshow onStyle.com If you have a seam at the waist line the buttonhole can be made by leaving a gap in the stitching line the length of the buttonhole. |
Zippers and guards

Step 1
 Trim the canvas back out of the seam allowance; fuse interfacing to the wrong side of the centre front seam allowance; right sides together, place the separating zipper so that one side of its teeth are sitting along the center front line and that the top of the zipper is approximately 1/4 inch (5 mm) down from the neckline stitching line; the lower end of the zipper is going to be approximately 3/8 inch (1 cm) up from the hem line; machine stitch along the outer edge of the zipper tape
  Make a guard that is going to be slightly shorter than the front opening with the finished wide approximately 3/4 inch (1.9 cm) plus 1-1 1/2 inches (2.5-3.5 cm).
Be creative with the guard, think of using a contrasting color, different texture such as leather or a satin. The ends can be squared or rounded.
Position the guard behind the zipper and pin in place.
 Finish by top stitching the zipper in place.
No comments:
Post a Comment