Tailoring 101 Week 9 The notched under collar
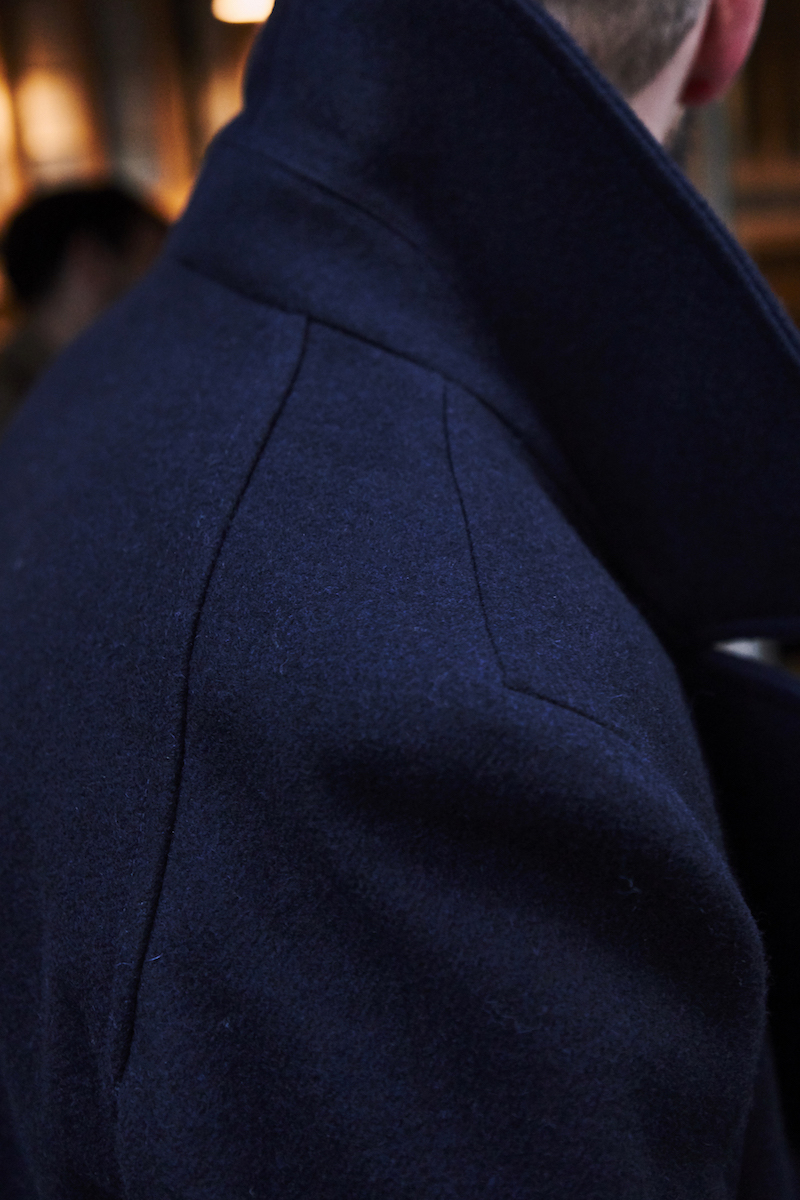 |
| https://www.permanentstyle.com/2019/01/the-unique-workwear-of-seh-kelly.html The under collar in this image is a two piece under collar. The collar stand and fall are patterned separately. |
Drafting the notched under collar
Step 1
 Place the front jacket pattern onto paper; extend the shoulder line out at the neck line edge the width of the collar stand A, or 1 inch (2.5 cm); extend the roll line up so that it passes though A; measure the back neck of the jacket; measure up from A the back neck measurement, mark as B;
Step 2

Step 3
 Square a line out from E and mark as G, this is a style line, the length is your choice; draw a line that connects G-F, as a guide line before adding a curve to this line at the front. E, is the rever notch.
The under collar draft is now complete, add seam allowances, cut out and check the fit on the jacket
Stitching the under collar
 The under collar is constructed from melton or under collar felt and hair canvas. For a firmer under collar or in men's wear use French canvas rather than hair canvas. (French canvas is sold on the bias, so cut as one piece)
The canvas is cut on the bias with a centre back seam. Only add a seam allowance to the center back. The center back seam allowance is over lapped and machine stitched together using a straight or zigzag stitch with a stitch length of 2.5-3mm. Secure both ends with a back tack.St the zigzag width as 3 if using.
 |
| Cut with center back seam for fashion fabric. |
The under collar can also be cut from your fashion fabric, a contrast color fabric and leather. If using fashion fabric cut on the bias with a center back seam. Cut without a center back seam for leather and as leather does not have a grain it it not cut on the bias.
Add a seam allowance of 3/8 inch (1cm) all around the under collar. On the wrong side of the fashion fabric under collar, chalk mark the seam allowance around the edge of the under collar.
Place the canvas on top of the melton under collar and baste together along the roll line.
 You can also add a bias cut piece of pocketing fabric between the canvas and melton or fashion fabric at either end of the collar. The pocketing is cut to cover approximately half the front of the collar. Baste stitch all together along the roll line.
Draw a line around the collar on the canvas that marks the seam allowance if using a melton undercollar.
If using fashion fabric; place the canvas onto the wrong side of the fashion fabric under collar so that it sits inside the marked seam allowances. Baste the fashion fabric to the canvas along the roll line.
The melton or fashion fabric under collar is now pad stitched to the canvas. Begin with the canvas side up to pad stitching the collar stand following the roll line with small 1/4 inch (5 mm) pad stitches. Use a thread the color of the melton or fashion fabric so that the pad stitches don't show, Do not stitch out into the seam allowance. Work in rows until the stand is covered in stitches.
Pad stitch the collar fall with 3/8-1/2 inch (1- 1.2 cm) stitches with the first row of stitches following along the roll line until the front outer corners of the collar. Fill in the corners with small 1/4-1/8 inch (5-3 mm) stitches.
Or you can pad stitch in a half circle as shown in Tailored fashion design page 145

Trim the canvas back so that you have a 1/8 inch (3 mm) margin of melton around the collar. You do this so that the raw edge of the canvas will not show though on the outside. On a man's jacket do not trim the canvas back at the ends of the collar.
If you are using fashion fabric press the seam allowance around the collar in so that it is sitting on the canvas. Baste stitch to hold before catch stitching the edge of the seam allowance to the canvas.
If you are attaching the top collar to the fashion fabric under collar by machine stitching press the seam allowance on the stand edge or neckline in so that it is sitting on the canvas. Baste stitch to hold in place before catch stitching to the canvas.
 If you are using leather or a Burberry style under collar you will be shaping the undercollar with machine stitching. This stitching will show on the right side of the undercollar so you can use a matching or contrast color thread. Begin by cutting the canvas as above and cut the leather or fashion fabric with a 3/8 inch (1cm) seam allowance. Mark the seam allowance around the collar with chalk, Place the canvas onto the wrong side of the leather or fashion fabric so that it sits inside the marked seam allowance. Chalk mark the roll line onto the canvas.
Machine stitch along the roll line using a stitch length of 3mm. Repeat 1/4 inch (6mm) in from the first line of stitching until you are stitching close to the stand edge. You will have rows of channel stitching on the right side of the undercollar.
Divide the collar in half on either side of the center back of the under collar and mark on the fall or outside edge of the under collar. Divide the collar again along the roll line and place a mark on the roll line that is between the marks on the fall or outside edge. Draw in lines that form triangles beginning at the collar point on the fall or outside edge up to the start of the roll line, down to the mark on the outside or fall edge and back up to the roll line. Keep these lines on the bias of the canvas. Machine stitch up and down these lines with a stitch length of 3mm. If you are using leather do not back tack.
Press all methods of undercollars
Or you can pad stitch in a half circle as shown in Tailored fashion design page 145

Trim the canvas back so that you have a 1/8 inch (3 mm) margin of melton around the collar. You do this so that the raw edge of the canvas will not show though on the outside. On a man's jacket do not trim the canvas back at the ends of the collar.
If you are using fashion fabric press the seam allowance around the collar in so that it is sitting on the canvas. Baste stitch to hold before catch stitching the edge of the seam allowance to the canvas.
If you are attaching the top collar to the fashion fabric under collar by machine stitching press the seam allowance on the stand edge or neckline in so that it is sitting on the canvas. Baste stitch to hold in place before catch stitching to the canvas.
 If you are using leather or a Burberry style under collar you will be shaping the undercollar with machine stitching. This stitching will show on the right side of the undercollar so you can use a matching or contrast color thread. Begin by cutting the canvas as above and cut the leather or fashion fabric with a 3/8 inch (1cm) seam allowance. Mark the seam allowance around the collar with chalk, Place the canvas onto the wrong side of the leather or fashion fabric so that it sits inside the marked seam allowance. Chalk mark the roll line onto the canvas.
Machine stitch along the roll line using a stitch length of 3mm. Repeat 1/4 inch (6mm) in from the first line of stitching until you are stitching close to the stand edge. You will have rows of channel stitching on the right side of the undercollar.
Divide the collar in half on either side of the center back of the under collar and mark on the fall or outside edge of the under collar. Divide the collar again along the roll line and place a mark on the roll line that is between the marks on the fall or outside edge. Draw in lines that form triangles beginning at the collar point on the fall or outside edge up to the start of the roll line, down to the mark on the outside or fall edge and back up to the roll line. Keep these lines on the bias of the canvas. Machine stitch up and down these lines with a stitch length of 3mm. If you are using leather do not back tack.
Press all methods of undercollars
The under collar is now ready to be shaped.
 Before the under collar is attached to the jacket body it has to be pressed into shape. Fold the under collar on the roll line and rap the collar around a tailors ham and stream into shape. Let the collar dry before removing from the ham; Place the collar on the ironing board keeping its shape; stretch the outer edge of the collar so that it is sitting flat on the ironing board.
 Press out the roll line crease at both ends of the roll line, leave the under collar to dry. This will give a soft roll line
The under collar is now ready to attach to the jacket neck line.
If you want a tighter fitting collar the collar stand can be shrank slightly and the roll line on the undercollar overcast with tight stitches. This will give a hard roll line.
Draw a chalk line from the front notch point (rever notches)around the neck line of the jacket to the rever notch point on the other side o f the jacket front to mark the seam line.
Place the edge of the collar stand on the chalk line matching the centre back seam, shoulder points and front notches (rever notches), pin in place.
 If you have a stand put the jacket on the stand and match the under collar to the marked neckline. Stretch the collar stand in the shoulder area if it is tight but not in the rever area. Baste the undercollar to the jacket. If you are making the jacket for a client fit the jacket on the client to make sure the roll line is sitting against the neck. Adjust before attaching the collar permanently to the jacket with small slip stitches or catch stitches.
 If you are using fashion fabric for your undercollar, Press the seam allowance open from the front notch point just before the shoulder line. Clip the seam allowance at this point and press the seam allowance onto the under collar.
(If you press open the seam allowance all the way around the neck line, you will have to clip the seam allowance in the back so that it lays flat. This weakens the seam,, and adds bulk at the shoulder line.)
Catch stitch the seam allowance to the canvas from the front notch point (rever point) to the clip.
From the clip catch stitch the back neckline to the undercollar canvas.
This will both strengthen the collar and reduce bulk.

For a molten undercollar -
Turn the jacket over so that the wrong side is facing up and catch stitch the seam allowance to the canvas.


